本项目采用了 百度人脸识别 第三方接口,实现了自选图片人脸识别和 两张图片的1:1对比,可返回比对相似度信息。
目前百度向个人开发者提供了免费人脸识别接口,QPS限制为2,企业认证后并发数可增至 5,亲测可用。
![]()

以下是简单应用:
一 、所需权限
二、第三方app id app key
可自行去百度 AI 平台申请注册
三、工具类
- http 工具类

 View Code
1 /** 2 * http 工具类 3 */ 4 public class HttpUtil { 5 6 public static String post(String requestUrl, String accessToken, String params) 7 throws Exception { 8 String contentType = "application/x-www-form-urlencoded"; 9 return HttpUtil.post(requestUrl, accessToken, contentType, params);10 }11 12 public static String post(String requestUrl, String accessToken, String contentType, String params)13 throws Exception {14 String encoding = "UTF-8";15 if (requestUrl.contains("nlp")) {16 encoding = "GBK";17 }18 return HttpUtil.post(requestUrl, accessToken, contentType, params, encoding);19 }20 21 public static String post(String requestUrl, String accessToken, String contentType, String params, String encoding)22 throws Exception {23 String url = requestUrl + "?access_token=" + accessToken;24 return HttpUtil.postGeneralUrl(url, contentType, params, encoding);25 }26 27 public static String postGeneralUrl(String generalUrl, String contentType, String params, String encoding)28 throws Exception {29 URL url = new URL(generalUrl);30 // 打开和URL之间的连接31 HttpURLConnection connection = (HttpURLConnection) url.openConnection();32 connection.setRequestMethod("POST");33 // 设置通用的请求属性34 connection.setRequestProperty("Content-Type", contentType);35 connection.setRequestProperty("Connection", "Keep-Alive");36 connection.setUseCaches(false);37 connection.setDoOutput(true);38 connection.setDoInput(true);39 40 // 得到请求的输出流对象41 DataOutputStream out = new DataOutputStream(connection.getOutputStream());42 out.write(params.getBytes(encoding));43 out.flush();44 out.close();45 46 // 建立实际的连接47 connection.connect();48 // 获取所有响应头字段49 Map - Base64 工具类 View Code
1 public class Base64Util { 2 private static final char last2byte = (char) Integer.parseInt("00000011", 2); 3 private static final char last4byte = (char) Integer.parseInt("00001111", 2); 4 private static final char last6byte = (char) Integer.parseInt("00111111", 2); 5 private static final char lead6byte = (char) Integer.parseInt("11111100", 2); 6 private static final char lead4byte = (char) Integer.parseInt("11110000", 2); 7 private static final char lead2byte = (char) Integer.parseInt("11000000", 2); 8 private static final char[] encodeTable = new char[] 9 {10 'A', 'B', 'C', 'D', 'E', 'F', 'G', 'H', 'I', 'J', 'K', 'L', 'M', 'N', 'O', 'P',11 'Q', 'R', 'S', 'T', 'U', 'V', 'W', 'X', 'Y', 'Z', 'a', 'b', 'c', 'd', 'e', 'f',12 'g', 'h', 'i', 'j', 'k', 'l', 'm', 'n', 'o', 'p', 'q', 'r', 's', 't', 'u', 'v',13 'w', 'x', 'y', 'z', '0', '1', '2', '3', '4', '5', '6', '7', '8', '9', '+', '/'14 };15 16 public Base64Util() {17 }18 19 public static String encode(byte[] from) {20 StringBuilder to = new StringBuilder((int) ((double) from.length * 1.34D) + 3);21 int num = 0;22 char currentByte = 0;23 24 int i;25 for (i = 0; i < from.length; ++i) {26 for (num %= 8; num < 8; num += 6) {27 switch (num) {28 case 0:29 currentByte = (char) (from[i] & lead6byte);30 currentByte = (char) (currentByte >>> 2);31 case 1:32 case 3:33 case 5:34 default:35 break;36 case 2:37 currentByte = (char) (from[i] & last6byte);38 break;39 case 4:40 currentByte = (char) (from[i] & last4byte);41 currentByte = (char) (currentByte << 2);42 if (i + 1 < from.length) {43 currentByte = (char) (currentByte | (from[i + 1] & lead2byte) >>> 6);44 }45 break;46 case 6:47 currentByte = (char) (from[i] & last2byte);48 currentByte = (char) (currentByte << 4);49 if (i + 1 < from.length) {50 currentByte = (char) (currentByte | (from[i + 1] & lead4byte) >>> 4);51 }52 }53 54 to.append(encodeTable[currentByte]);55 }56 }57 58 if (to.length() % 4 != 0) {59 for (i = 4 - to.length() % 4; i > 0; --i) {60 to.append("=");61 }62 }63 64 return to.toString();65 }66 }
以上是实现的Base64的加密算法,使用自带 Base64.encodeToString(); 方法也可以。
Base64原理可参考这篇博文:
四、获取token
主要代码:
1 /** 2 * 获取token类 3 */ 4 public class AuthService { 5 6 /** 7 * 获取权限token 8 * @return 返回示例: 9 * {10 * "access_token": "24.460da4889caad24cccdb1fea17221975.2592000.1491995545.282335-1234567",11 * "expires_in": 259200012 * }13 */14 public static String getAuth() {15 // 官网获取的 API Key 更新为你注册的16 String clientId = "百度云应用的AK";17 // 官网获取的 Secret Key 更新为你注册的18 String clientSecret = "百度云应用的SK";19 return getAuth(clientId, clientSecret);20 }21 22 /**23 * 获取API访问token24 * 该token有一定的有效期,需要自行管理,当失效时需重新获取.25 * @param ak - 百度云官网获取的 API Key26 * @param sk - 百度云官网获取的 Securet Key27 * @return assess_token 示例:28 * "24.460da4889caad24cccdb1fea17221975.2592000.1491995545.282335-1234567"29 */30 public static String getAuth(String ak, String sk) {31 // 获取token地址32 String authHost = "https://aip.baidubce.com/oauth/2.0/token?";33 String getAccessTokenUrl = authHost34 // 1. grant_type为固定参数35 + "grant_type=client_credentials"36 // 2. 官网获取的 API Key37 + "&client_id=" + ak38 // 3. 官网获取的 Secret Key39 + "&client_secret=" + sk;40 try {41 URL realUrl = new URL(getAccessTokenUrl);42 // 打开和URL之间的连接43 HttpURLConnection connection = (HttpURLConnection) realUrl.openConnection();44 connection.setRequestMethod("GET");45 connection.connect();46 // 获取所有响应头字段47 Map > map = connection.getHeaderFields();48 // 遍历所有的响应头字段49 for (String key : map.keySet()) {50 System.err.println(key + "--->" + map.get(key));51 }52 // 定义 BufferedReader输入流来读取URL的响应53 BufferedReader in = new BufferedReader(new InputStreamReader(connection.getInputStream()));54 String result = "";55 String line;56 while ((line = in.readLine()) != null) {57 result += line;58 }59 /**60 * 返回结果示例61 */62 System.err.println("result:" + result);63 JSONObject jsonObject = new JSONObject(result);64 String access_token = jsonObject.getString("access_token");65 return access_token;66 } catch (Exception e) {67 System.err.printf("获取token失败!");68 e.printStackTrace(System.err);69 }70 return null;71 }72 73 }
注意:
access_token的有效期为30天,切记需要每30天进行定期更换,或者每次请求都拉取新token;
五、验证请求
主要代码:
1 public class FaceMatch { 2 3 /** 4 * 重要提示代码中所需工具类 5 * FileUtil,Base64Util,HttpUtil,GsonUtils请从 6 * https://ai.baidu.com/file/658A35ABAB2D404FBF903F64D47C1F72 7 * https://ai.baidu.com/file/C8D81F3301E24D2892968F09AE1AD6E2 8 * https://ai.baidu.com/file/544D677F5D4E4F17B4122FBD60DB82B3 9 * https://ai.baidu.com/file/470B3ACCA3FE43788B5A963BF0B625F310 * 下载11 */12 public static String match(byte[] mImg1,byte[] mImg2,String accessToken) {13 // 请求url14 String url = "https://aip.baidubce.com/rest/2.0/face/v2/match";15 try {16 // String imgStr = Base64.encodeToString(mImg1, 0);17 String imgStr = Base64Util.encode(mImg1);18 String imgParam = URLEncoder.encode(imgStr, "UTF-8");19 String imgStr2 = Base64Util.encode(mImg2);20 String imgParam2 = URLEncoder.encode(imgStr2, "UTF-8");21 22 String param = "images=" + imgParam + "," + imgParam2;23 24 // 注意这里仅为了简化编码每一次请求都去获取access_token,线上环境access_token有过期时间, 客户端可自行缓存,过期后重新获取。25 String result = HttpUtil.post(url, accessToken, param);26 System.out.println(result);27 return result;28 } catch (Exception e) {29 e.printStackTrace();30 }31 return null;32 }33 }
注意事项:
- 请求体格式化:Content-Type为
application/x-www-form-urlencoded,通过urlencode格式化请求体。 - Base64编码:请求的图片需经过
Base64编码,图片的base64编码指将图片数据编码成一串字符串,使用该字符串代替图像地址。您可以首先得到图片的二进制,然后用Base64格式编码即可。需要注意的是,图片的base64编码是不包含图片头的,如data:image/jpg;base64, - 图片格式:现支持PNG、JPG、JPEG、BMP,不支持GIF图片
URL参数:
| 参数 | 值 |
|---|---|
| access_token | 通过API Key和Secret Key获取的access_token |
Header:
| 参数 | 值 |
|---|---|
| Content-Type | application/x-www-form-urlencoded |
Body中放置请求参数,参数详情如下:
请求参数
| 参数 | 必选 | 类型 | 说明 |
|---|---|---|---|
| images | 是 | string | 分别base64编码后的2张图片数据,需urlencode,半角逗号分隔,单次请求最大不超过20M |
| ext_fields | 否 | string | 返回质量信息,取值固定,目前支持qualities(质量检测)(对所有图片都会做改处理) |
| image_liveness | 否 | string | 返回的活体信息,“faceliveness,faceliveness” 表示对比对的两张图片都做活体检测;“,faceliveness” 表示对第一张图片不做活体检测、第二张图做活体检测;“faceliveness,” 表示对第一张图片做活体检测、第二张图不做活体检测;注:需要用于判断活体的图片,图片中的人脸像素面积需要不小于100px*100px,人脸长宽与图片长宽比例,不小于1/3 |
| types | 否 | string | 请求对比的两张图片的类型,示例:“7,13” 7表示生活照:通常为手机、相机拍摄的人像图片、或从网络获取的人像图片等11表示身份证芯片照:二代身份证内置芯片中的人像照片12表示带水印证件照:一般为带水印的小图,如公安网小图13表示证件照片:如拍摄的身份证、工卡、护照、学生证等证件图片,注:需要确保人脸部分不可太小,通常为100px*100px |
说明:两张请求的图片请分别进行base64编码。
返回说明
返回参数
| 字段 | 必选 | 类型 | 说明 |
|---|---|---|---|
| log_id | 是 | uint64 | 请求唯一标识码,随机数 |
| result_num | 是 | uint32 | 返回结果数目,即:result数组中元素个数 |
| result | 是 | array(object) | 结果数据,index和请求图片index对应。数组元素为每张图片的匹配得分数组,top n。得分范围[0,100.0] |
| +index_i | 是 | uint32 | 比对图片1的index |
| +index_j | 是 | uint32 | 比对图片2的index |
| +score | 是 | double | 比对得分,推荐80分作为阈值,80分以上可以判断为同一人,此分值对应万分之一误识率 |
| ext_info | 否 | array(dict) | 对应参数中的ext_fields |
| +qualities | 否 | string | 质量相关的信息,无特殊需求可以不使用 |
| +faceliveness | 否 | string | 活体检测分数,单帧活体检测参考阈值0.393241,超过此分值以上则可认为是活体。注意:活体检测接口主要用于判断是否为二次翻拍,需要限制用户为当场拍照获取图片;推荐配合有动作校验活体使用 |
返回示例
//请求两张图片{ "log_id": 73473737, "result_num":1, "result": [ { "index_i": 0, "index_j": 1, "score": 44.3 } ]} 六、主页面activity
主要代码:
1 import android.content.ContentResolver; 2 import android.content.Intent; 3 import android.graphics.Bitmap; 4 import android.graphics.BitmapFactory; 5 import android.net.Uri; 6 import android.os.Bundle; 7 import android.os.Handler; 8 import android.os.Message; 9 import android.support.v7.app.AlertDialog; 10 import android.support.v7.app.AppCompatActivity; 11 import android.text.TextUtils; 12 import android.util.Log; 13 import android.view.View; 14 import android.widget.Button; 15 import android.widget.ImageView; 16 import android.widget.TextView; 17 import android.widget.Toast; 18 19 import com.example.lifen.baidufacecomparedemo.R; 20 import com.example.lifen.baidufacecomparedemo.utils.AuthService; 21 import com.example.lifen.baidufacecomparedemo.utils.FaceMatch; 22 23 import java.io.ByteArrayOutputStream; 24 import java.io.FileNotFoundException; 25 26 /** 27 * 人脸对比 1:1 28 * 29 * @author LiFen 30 */ 31 public class MainActivity extends AppCompatActivity { 32 private static final String TAG = "MainActivity"; 33 private static final int REQUEST_CODE1 = 11; 34 private static final int REQUEST_CODE2 = 12; 35 ImageView mImageView1; 36 ImageView mImageView2; 37 Button mCompareBtn; 38 TextView mResultText; 39 private byte[] mImg1; 40 private byte[] mImg2; 41 String key = "";//api_key 42 String secret ="";//api_secret 43 private final static int i = 100; 44 45 private Handler handler = new Handler(){ 46 @Override 47 public void handleMessage(Message msg) { 48 if(msg.what == i){ 49 mResultText.setText((String)msg.obj); 50 } 51 } 52 }; 53 @Override 54 protected void onCreate(Bundle savedInstanceState) { 55 super.onCreate(savedInstanceState); 56 setContentView(R.layout.activity_main); 57 58 mImageView1 = (ImageView) findViewById(R.id.img1); 59 mImageView2 = (ImageView) findViewById(R.id.img2); 60 mCompareBtn = (Button) findViewById(R.id.compareBtn); 61 mResultText = (TextView) findViewById(R.id.resultBtn); 62 if(TextUtils.isEmpty(key) || TextUtils.isEmpty(secret)){ 63 AlertDialog.Builder builder = new AlertDialog.Builder(this); 64 builder.setMessage("please enter key and secret"); 65 builder.setTitle(""); 66 builder.show(); 67 return; 68 } 69 mImageView1.setOnClickListener(new View.OnClickListener() { 70 @Override 71 public void onClick(View v) { 72 startAlbumActivity(REQUEST_CODE1); 73 } 74 }); 75 mImageView2.setOnClickListener(new View.OnClickListener() { 76 @Override 77 public void onClick(View v) { 78 startAlbumActivity(REQUEST_CODE2); 79 } 80 }); 81 mCompareBtn.setOnClickListener(new View.OnClickListener() { 82 @Override 83 public void onClick(View v) { 84 startCompare(); 85 } 86 }); 87 } 88 89 private void startCompare() { 90 if ("".equals(mImg1) || mImg1 == null || "".equals(mImg2) || mImg2 == null) { 91 Toast.makeText(this, "请选择图片再比对", Toast.LENGTH_SHORT).show(); 92 return; 93 } 94 mResultText.setText("比对中..."); 95 new Thread(new Runnable() { 96 @Override 97 public void run() { 98 try{ 99 String accessToken = AuthService.getAuth(key,secret);100 Log.i(TAG, "run: " +accessToken);101 Log.i(TAG, "run: " + mImg1.toString());102 Log.i(TAG, "run: " + mImg2.toString());103 String result = FaceMatch.match(mImg1,mImg2,accessToken);104 Message msg = new Message();105 msg.what = i;106 msg.obj = result;107 handler.sendMessage(msg);108 }catch (Exception e){109 Log.i(TAG, "startCompare: " + e.toString());110 }111 }112 }).start();113 }114 115 private void startAlbumActivity(int requestCode) {116 Intent intent = new Intent();117 intent.setType("image/*");118 intent.setAction(Intent.ACTION_GET_CONTENT);119 startActivityForResult(intent, requestCode);120 }121 122 @Override123 protected void onActivityResult(int requestCode, int resultCode, Intent data) {124 if (data == null)125 return;126 Uri uri = data.getData();127 Log.e("uri", uri.toString());128 ContentResolver cr = this.getContentResolver();129 Bitmap bitmap = null;130 try {131 bitmap = BitmapFactory.decodeStream(cr.openInputStream(uri));132 /* 将Bitmap设定到ImageView */133 } catch (FileNotFoundException e) {134 Log.e("Exception", e.getMessage(), e);135 }136 if (resultCode == RESULT_OK && requestCode == REQUEST_CODE1) {137 mImageView1.setImageBitmap(bitmap);138 ByteArrayOutputStream baos = new ByteArrayOutputStream();139 bitmap.compress(Bitmap.CompressFormat.JPEG, 100, baos);140 byte[] datas = baos.toByteArray();141 mImg1 = datas;142 } else if (resultCode == RESULT_OK && requestCode == REQUEST_CODE2) {143 mImageView2.setImageBitmap(bitmap);144 ByteArrayOutputStream baos = new ByteArrayOutputStream();145 bitmap.compress(Bitmap.CompressFormat.JPEG, 100, baos);146 byte[] datas = baos.toByteArray();147 mImg2 = datas;148 }149 super.onActivityResult(requestCode, resultCode, data);150 }151 } 注意:key自行注册获取
七、布局文件
页面效果:
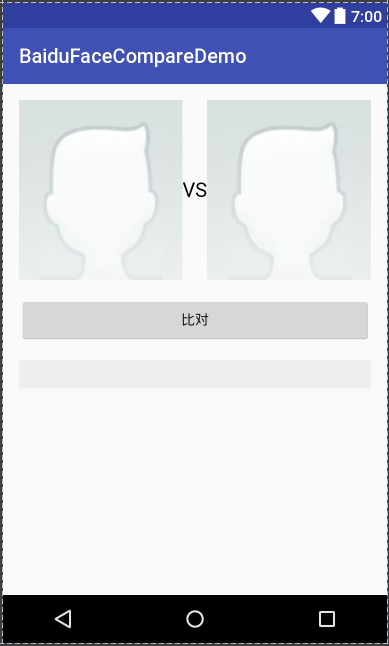
代码如下:
1 212 13 17 18 22 23 30 31 38 39 46 47 48 49 55 56 63 64 65
项目源码地址: